betty@kaihong888.com

Get A Quote
What is the Best Way to Paint Ceramics?
Painting ceramics is a delightful and rewarding hobby that allows you to personalize and beautify everyday objects. Whether you are a seasoned artist or a beginner looking to explore a new craft, painting ceramics offers endless possibilities for creativity. This article will guide you through the best way to paint ceramics, from selecting the right materials to mastering essential techniques. So, grab your brushes and ceramic paint, and let's get started!
Choosing the Right Ceramic Paint
Understanding Different Types of Ceramic Paint
Before you begin painting, it's crucial to choose the right ceramic paint for your project. There are several types of ceramic paints available, each with its own unique properties and uses. Here are the most common types:
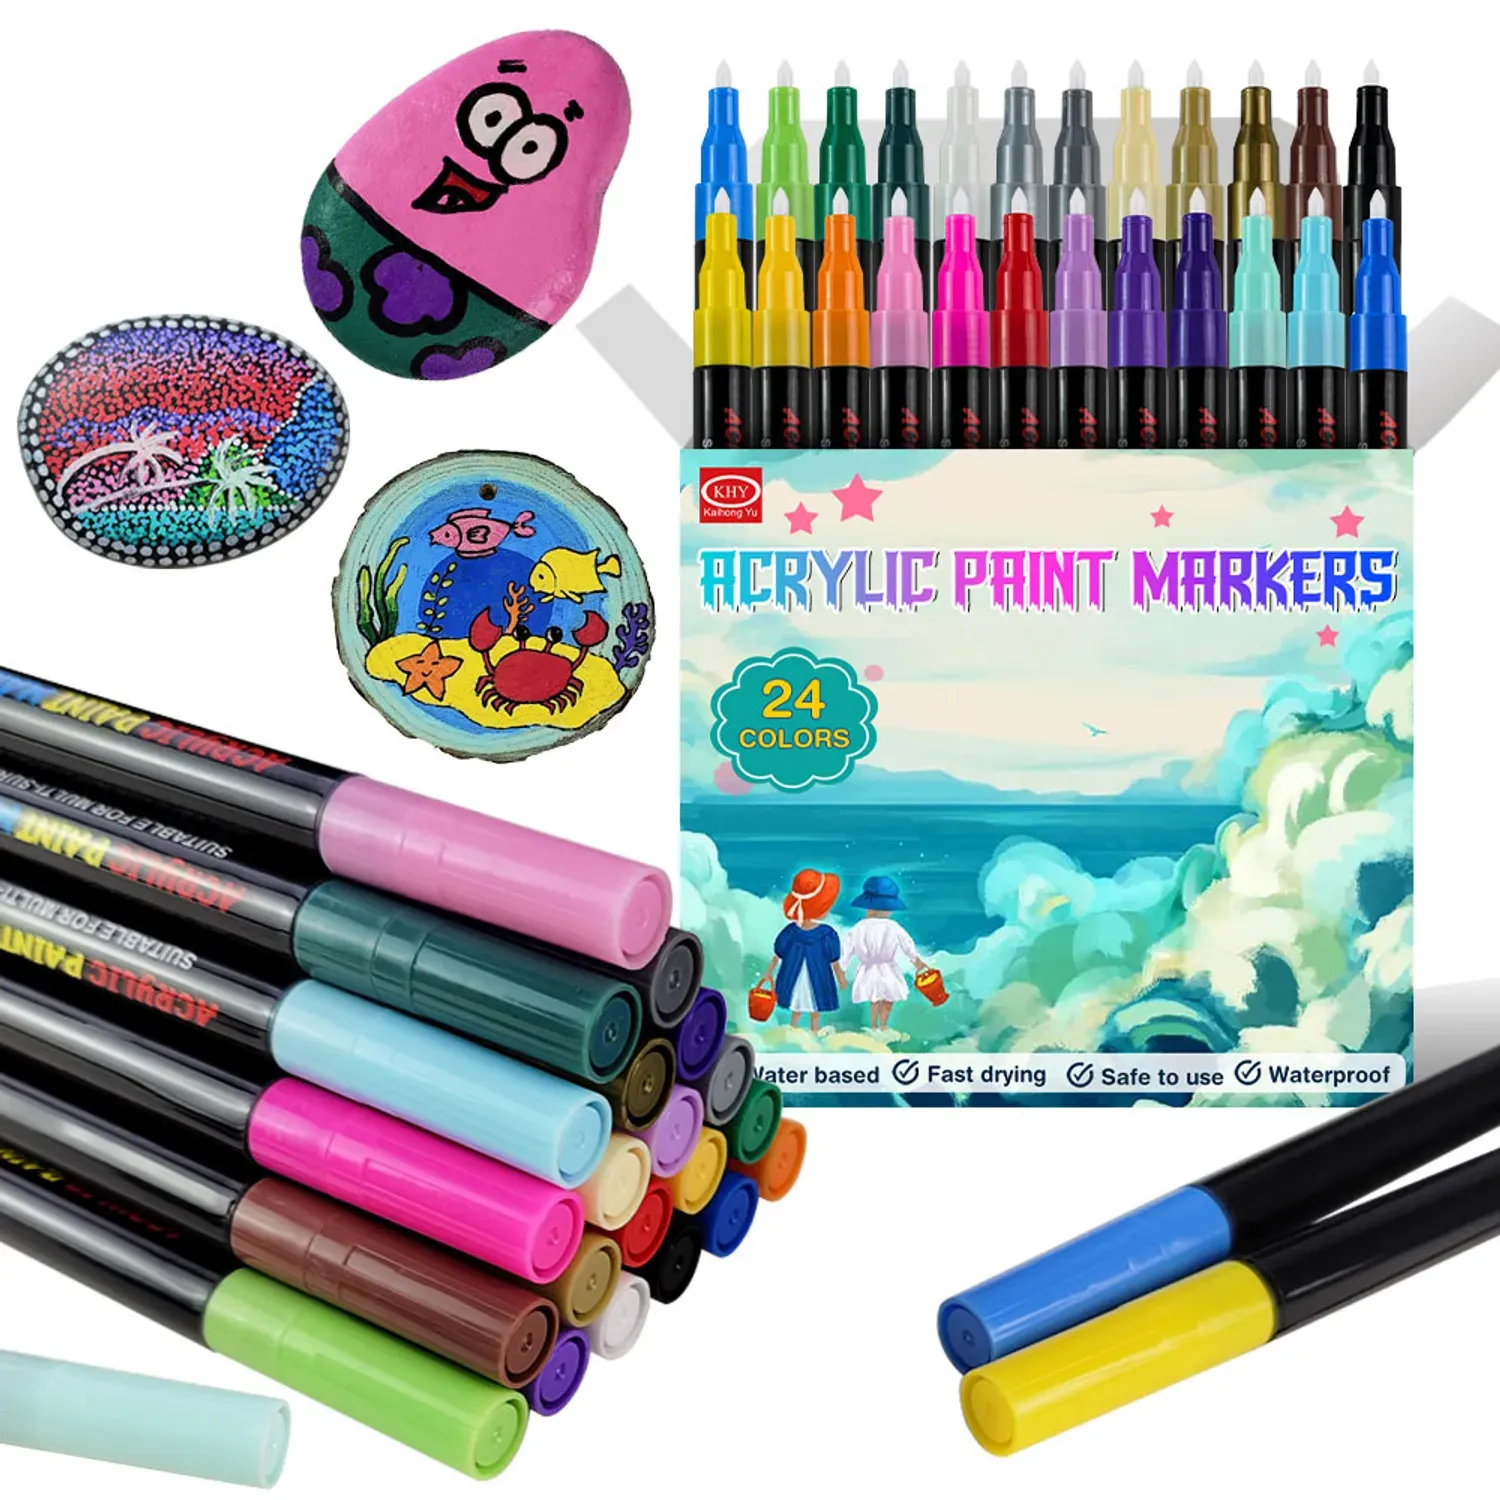
- Acrylic Paints: These are versatile and easy to use, making them ideal for beginners. Acrylic ceramic paints come in a wide range of colors and can be mixed to create custom shades. They dry quickly and are suitable for a variety of surfaces.
- Underglazes: These are specialized ceramic paints used for painting designs on greenware (unfired clay) or bisque ware (fired but unglazed clay). They require a glaze to be applied over them before the final firing.
- Glazes: Glazes are a type of ceramic paint that becomes glossy and vitrified when fired in a kiln. They provide a durable, waterproof finish and are often used for functional ceramics like plates and mugs.
- Overglazes: These are decorative ceramic paints applied over a fired glaze. They add extra detail and color and require a final firing to set.
Selecting the Right Brushes and Tools
Choosing the right brushes and tools is essential for achieving a smooth and professional finish. Here are some tips:
- Brushes: Use soft-bristled brushes for applying smooth, even coats of paint. Round brushes are great for detailed work, while flat brushes are ideal for covering large areas.
- Sponges and Stamps: These tools can add interesting textures and patterns to your ceramics. Sponges are perfect for creating soft, blended effects, while stamps can be used for repetitive designs.
- Detailing Tools: Fine-tipped brushes and styluses are excellent for intricate details and fine lines.
Preparing Your Ceramic Surface
Cleaning and Sanding
Proper preparation of your ceramic surface is crucial for the paint to adhere well. Use a damp cloth to wipe off any dust, dirt, or grease. For a more thorough cleaning, use a mild detergent and rinse well with water. Allow the ceramic to dry completely before painting. If the ceramic has a glossy finish, lightly sand it with fine-grit sandpaper to create a rough surface that the paint can grip. Wipe away any sanding dust with a damp cloth.
Priming Your Ceramic
Applying a primer is not always necessary but can enhance paint adhesion, especially on glazed ceramics. Use a ceramic primer designed for your chosen type of paint and follow the manufacturer’s instructions.
Mastering Basic Ceramic Painting Techniques
Base Coating
A solid base coat is essential for any ceramic painting project. Use a wide, flat brush to apply an even layer of ceramic paint. Avoid overloading the brush to prevent drips and streaks. For opaque coverage, apply two to three thin coats, allowing each layer to dry completely before applying the next. Follow the manufacturer’s recommendations for drying times between coats to ensure a smooth finish.
Adding Designs and Details
Once your base coat is dry, it’s time to add designs and details. Use fine-tipped brushes for detailed work. Practice your design on paper first, then transfer it to the ceramic. Stencils are a great way to achieve precise, repeatable designs. Secure the stencil to the ceramic and apply paint using a sponge or brush. Dip a stamp into ceramic paint and press it firmly onto the ceramic surface. Repeat as needed to create patterns. Dab a sponge into paint and gently press it onto the ceramic to create a textured, mottled effect.
Advanced Ceramic Painting Techniques
Layering and Blending Colors
Layering and blending colors can add depth and dimension to your ceramic pieces. Apply multiple layers of different colors, allowing each layer to dry before adding the next. This technique is great for creating complex, rich designs. While the paint is still wet, use a clean brush or sponge to blend colors together. This technique works well for creating gradients and soft transitions.
Using Special Effects
Special effects can make your ceramics stand out. Metallic and pearlescent paints add a shimmering effect and are perfect for accents and highlights. Applying a crackle medium between layers of paint creates a crackled, antique look. Use a toothbrush or stiff brush to flick paint onto the ceramic for a speckled effect.
Sealing and Firing Your Painted Ceramics
Sealing Your Work
If you are using acrylic paints or underglazes, it’s important to seal your work to protect it. Use a clear, acrylic spray sealer to protect your design. Apply several thin coats, allowing each coat to dry completely. For a thicker, more durable finish, use a brush-on sealer. Apply evenly and allow to dry.
Firing Your Ceramics
If you’ve used glazes or overglazes, firing is the final step. Place your painted ceramics in a kiln and fire according to the glaze manufacturer’s instructions. The firing process will vary depending on the type of glaze and the ceramic material. For some ceramic paints, you can cure the piece in a conventional oven. Follow the paint manufacturer’s guidelines for temperature and time.
Troubleshooting Common Issues
Uneven Paint Coverage
If you notice uneven paint coverage, try applying thin, even coats of paint, allowing each to dry before adding the next. Ensure your paint is well-mixed before application to prevent streaks and clumps.
Paint Chipping or Peeling
To prevent paint chipping or peeling, ensure the ceramic surface is clean and sanded before painting. Always seal your finished piece with an appropriate sealer to protect the paint.
Conclusion
Painting ceramics is a fulfilling hobby that offers endless creative possibilities. By following these tips and techniques, you can create beautiful, personalized ceramic pieces that are sure to impress. Whether you're painting a simple mug or an elaborate vase, the best way to paint ceramics is to experiment, have fun, and let your creativity shine. Remember, the key to success lies in selecting the right ceramic paint, preparing your surface properly, and mastering both basic and advanced painting techniques.
For all your ceramic painting needs, consider sourcing high-quality paints and materials from KHY. As a leading supplier in the industry, KHY offers a wide range of DIY paint products suitable for various ceramic projects. Whether you're a hobbyist or a professional artist, KHY provides bulk professional paint products that ensure superior performance and durability. Start your ceramic painting journey with KHY and unleash your creativity!